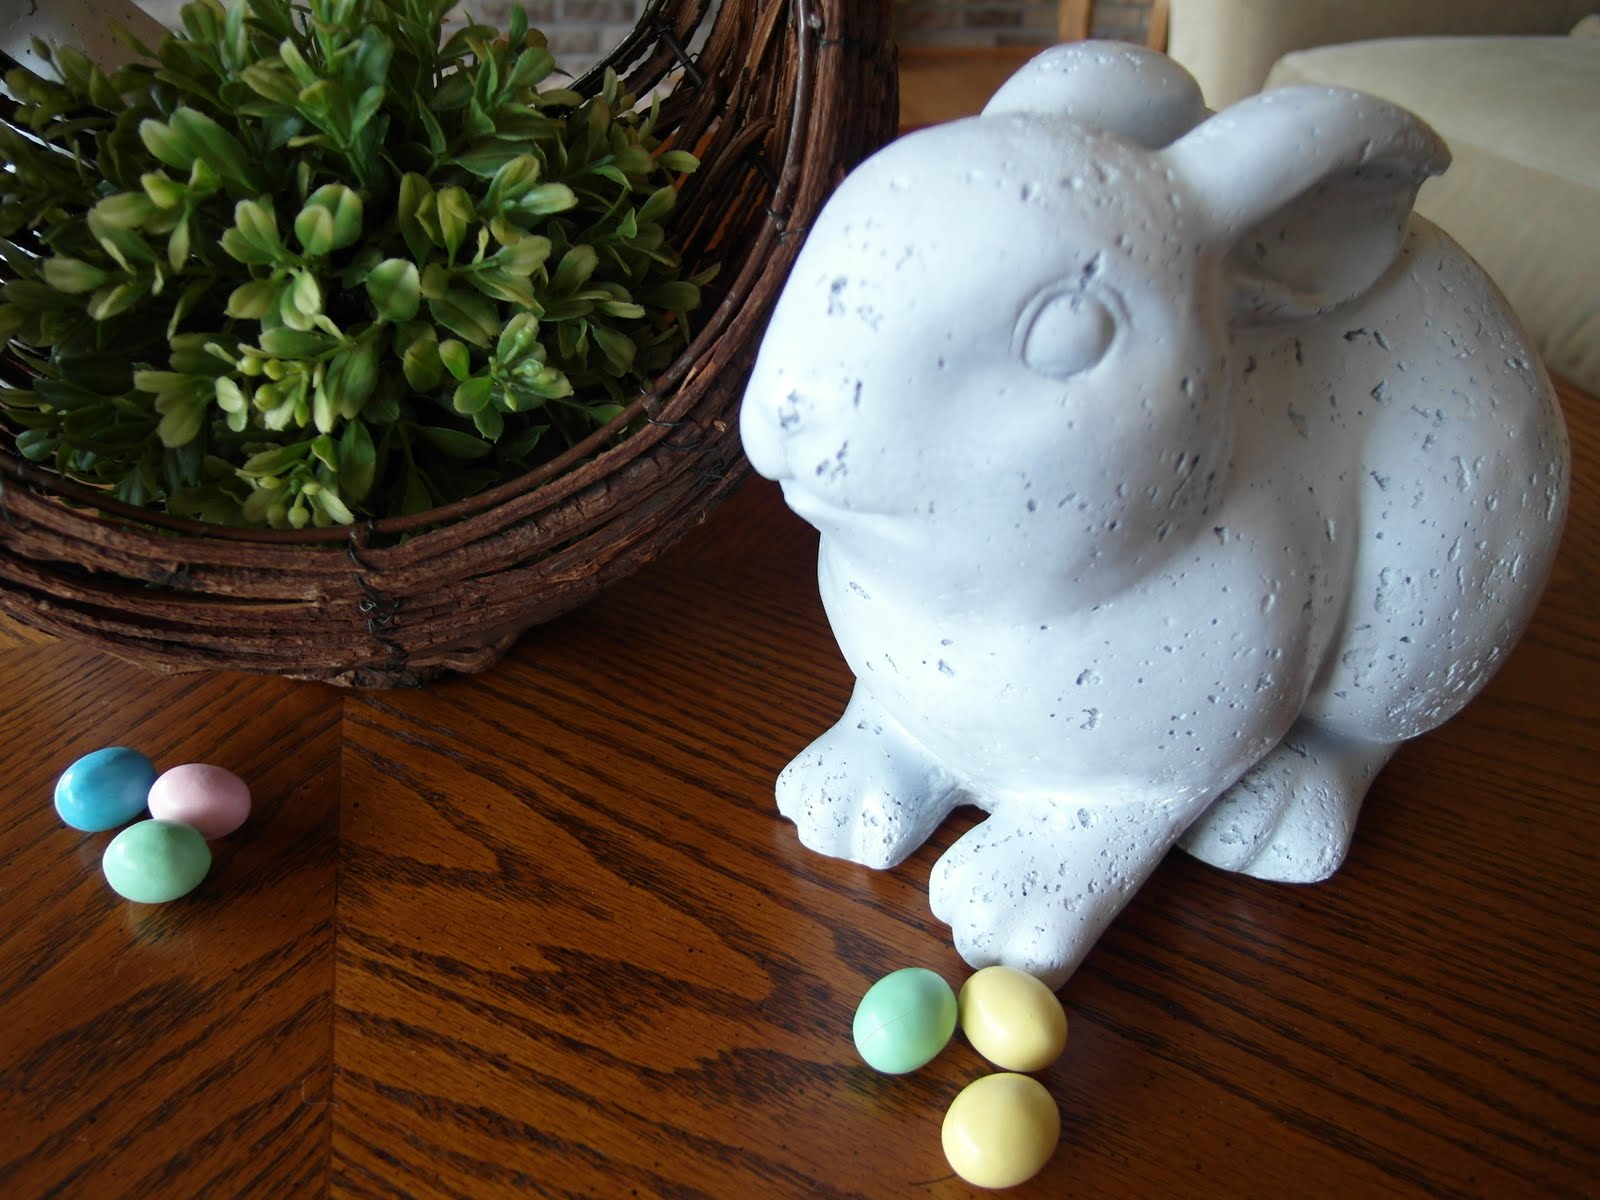
Have you seen the Pottery Barn catalog with the cute white ceramic bunnies? They are adorable but a little expensive for this girl. So we decided to make our own.
Wal-Mart had these gray resin bunnies for around $10 each. That's close to a third of what the PB bunnies are.
Nothing a little glossy white spray paint can't cure!!
Now we have the look of PB without the cost!! And I can spend my money on chocolate peanut butter eggs instead. Yum!
The ceramic bunnies appear in the latest Pottery Barn catalog. I was unable to find them on their website.
Showing posts with label Crafts. Show all posts
Sunday, April 10, 2011
Sunday, December 19, 2010
Fun Ornament Craft
To take a break from shopping, wrapping, decorating and cooking, we decided today was a craft day at our house. My daughter got a pottery wheel for her birthday that we tried out. What fun!! I want one for myself. The pot is drying right now, ready to be painted in a couple days.
We also decorated some glass bulb ornaments. I bought a 4-pack of plain glass bulbs and some paint markers from Hobby Lobby. The two of us did some free-painting - no plan or directions. Just paint what you want.
She painted two and I painted one. Mine was a "Let It Snow" theme.
Then we shared one. I wrote our last name on it and then my daughter did portraits of everyone in our family - including Daisy the Bratty Yorkie-Poo. This one is my favorite.
This was so easy, cheap and fun. And these ornaments are fun additions to our tree.
Here are a couple tips:
We also decorated some glass bulb ornaments. I bought a 4-pack of plain glass bulbs and some paint markers from Hobby Lobby. The two of us did some free-painting - no plan or directions. Just paint what you want.
She painted two and I painted one. Mine was a "Let It Snow" theme.
Then we shared one. I wrote our last name on it and then my daughter did portraits of everyone in our family - including Daisy the Bratty Yorkie-Poo. This one is my favorite.
This was so easy, cheap and fun. And these ornaments are fun additions to our tree.
Here are a couple tips:
- Use the box they came in to hold the bulb while you paint on it.
- Nail polish remover takes the paint off if you happen to make a mistake!
- Keep the packaging to put the bulbs back in for storage after the tree comes down.
Sunday, October 24, 2010
Making Curtains a Little Creepy
We're getting ready for our annual Halloween party. With the exception of a couple years, we have been holding a Halloween party since we moved into this house 9 years ago. Our neighborhood gets CRAZY during trick-or-treat time so family and friends hang out at our house and it is a great time! Can't wait.
So we have been decorating the house for the big night. Today my daughter and I make some easy curtain embellishments in the forms of some creepy creatures. Hobby Lobby had these great Halloween shapes you can decorate.
We decided to decoupage them with some Mod Podge and some wrinkled tissue paper.
The key is wadding up your tissue paper really good and then carefully un-wadding.
Then you cover one side with Mod Podge and press down on the tissue paper. We let that side dry and then did the other side. I used an Exacto knife to trim the excess tissue paper.
They came with the black tie so I tied one on each curtain rod - two in the dining area and one in the living room.
I think they turned out great! And it was such and easy and fun Sunday afternoon project!
Don't forget our Happy Hour Link Party happening this Wednesday!! Hope to see you there!
So we have been decorating the house for the big night. Today my daughter and I make some easy curtain embellishments in the forms of some creepy creatures. Hobby Lobby had these great Halloween shapes you can decorate.
We decided to decoupage them with some Mod Podge and some wrinkled tissue paper.
The key is wadding up your tissue paper really good and then carefully un-wadding.
Then you cover one side with Mod Podge and press down on the tissue paper. We let that side dry and then did the other side. I used an Exacto knife to trim the excess tissue paper.
They came with the black tie so I tied one on each curtain rod - two in the dining area and one in the living room.
I think they turned out great! And it was such and easy and fun Sunday afternoon project!
Don't forget our Happy Hour Link Party happening this Wednesday!! Hope to see you there!
Sunday, October 3, 2010
Spooky Tree for Halloween
Remember my white twig centerpiece I did a couple weeks ago? I used it for the chocolate and turquoise tablescape that was one of my favorites! And now I have repurposed it for a Halloween decoration. This was a fun project my daughter and I did this afternoon.
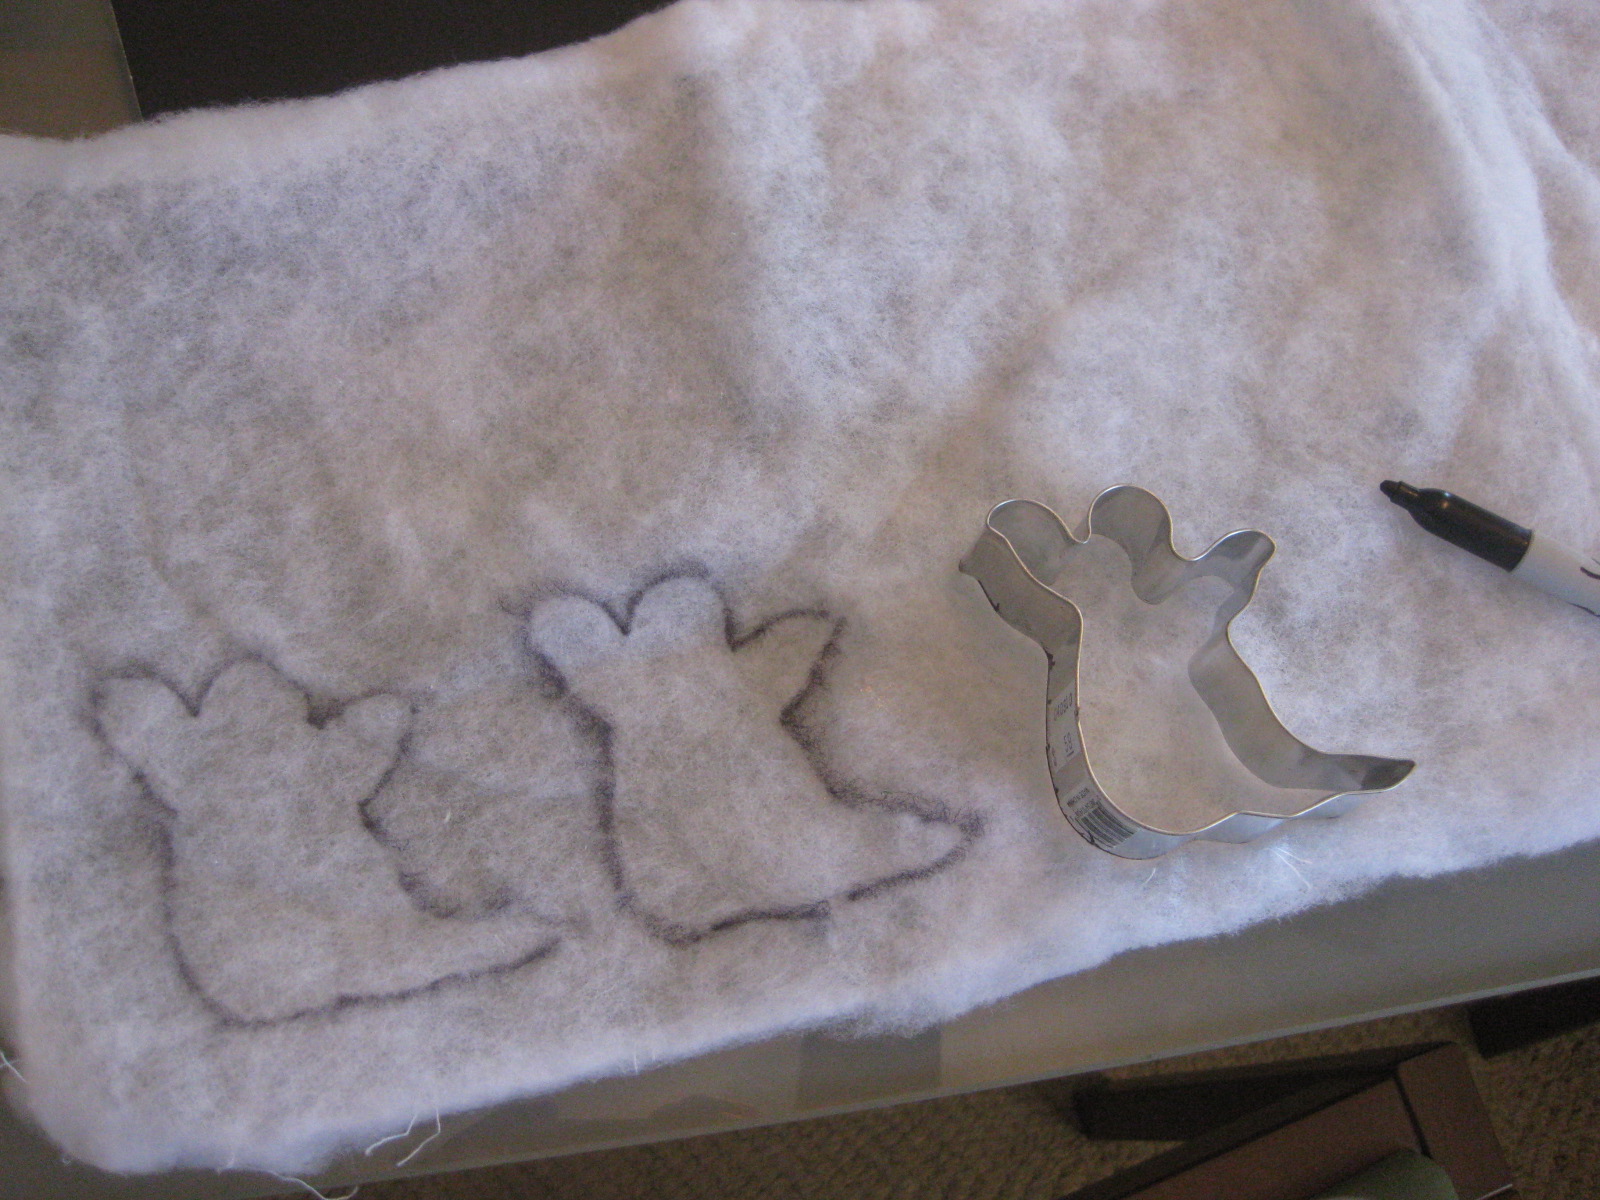
We used black poster board, an old envelope, some leftover batting and fabric, and cookie cutters for templates.
The batting was perfect for the ghosts. It's see-through and wispy, just like ghosts! I only needed one moon so the old envelope worked perfect. And of course bats need to be black so we bought some poster board. We traced around the cookie cutters and cut out the shapes. I used a thread and needle to hang the shapes on the tree.
I had some leftover fabric that I wrapped around the base of the centerpiece and tucked it in the top.
While buying the poster board we found a scary "crystal" skull candle holder. I had three goblets that I didn't know what to do with, but they go perfectly with the skull as candle holders!!
Now we have even more Halloween decorations to enjoy! Do you need some great Halloween ideas? Go to Between Naps on the Porch and check out Metamorphosis Monday!!
We used black poster board, an old envelope, some leftover batting and fabric, and cookie cutters for templates.
The batting was perfect for the ghosts. It's see-through and wispy, just like ghosts! I only needed one moon so the old envelope worked perfect. And of course bats need to be black so we bought some poster board. We traced around the cookie cutters and cut out the shapes. I used a thread and needle to hang the shapes on the tree.
I had some leftover fabric that I wrapped around the base of the centerpiece and tucked it in the top.
While buying the poster board we found a scary "crystal" skull candle holder. I had three goblets that I didn't know what to do with, but they go perfectly with the skull as candle holders!!
Now we have even more Halloween decorations to enjoy! Do you need some great Halloween ideas? Go to Between Naps on the Porch and check out Metamorphosis Monday!!
Monday, September 20, 2010
White Twig Centerpiece
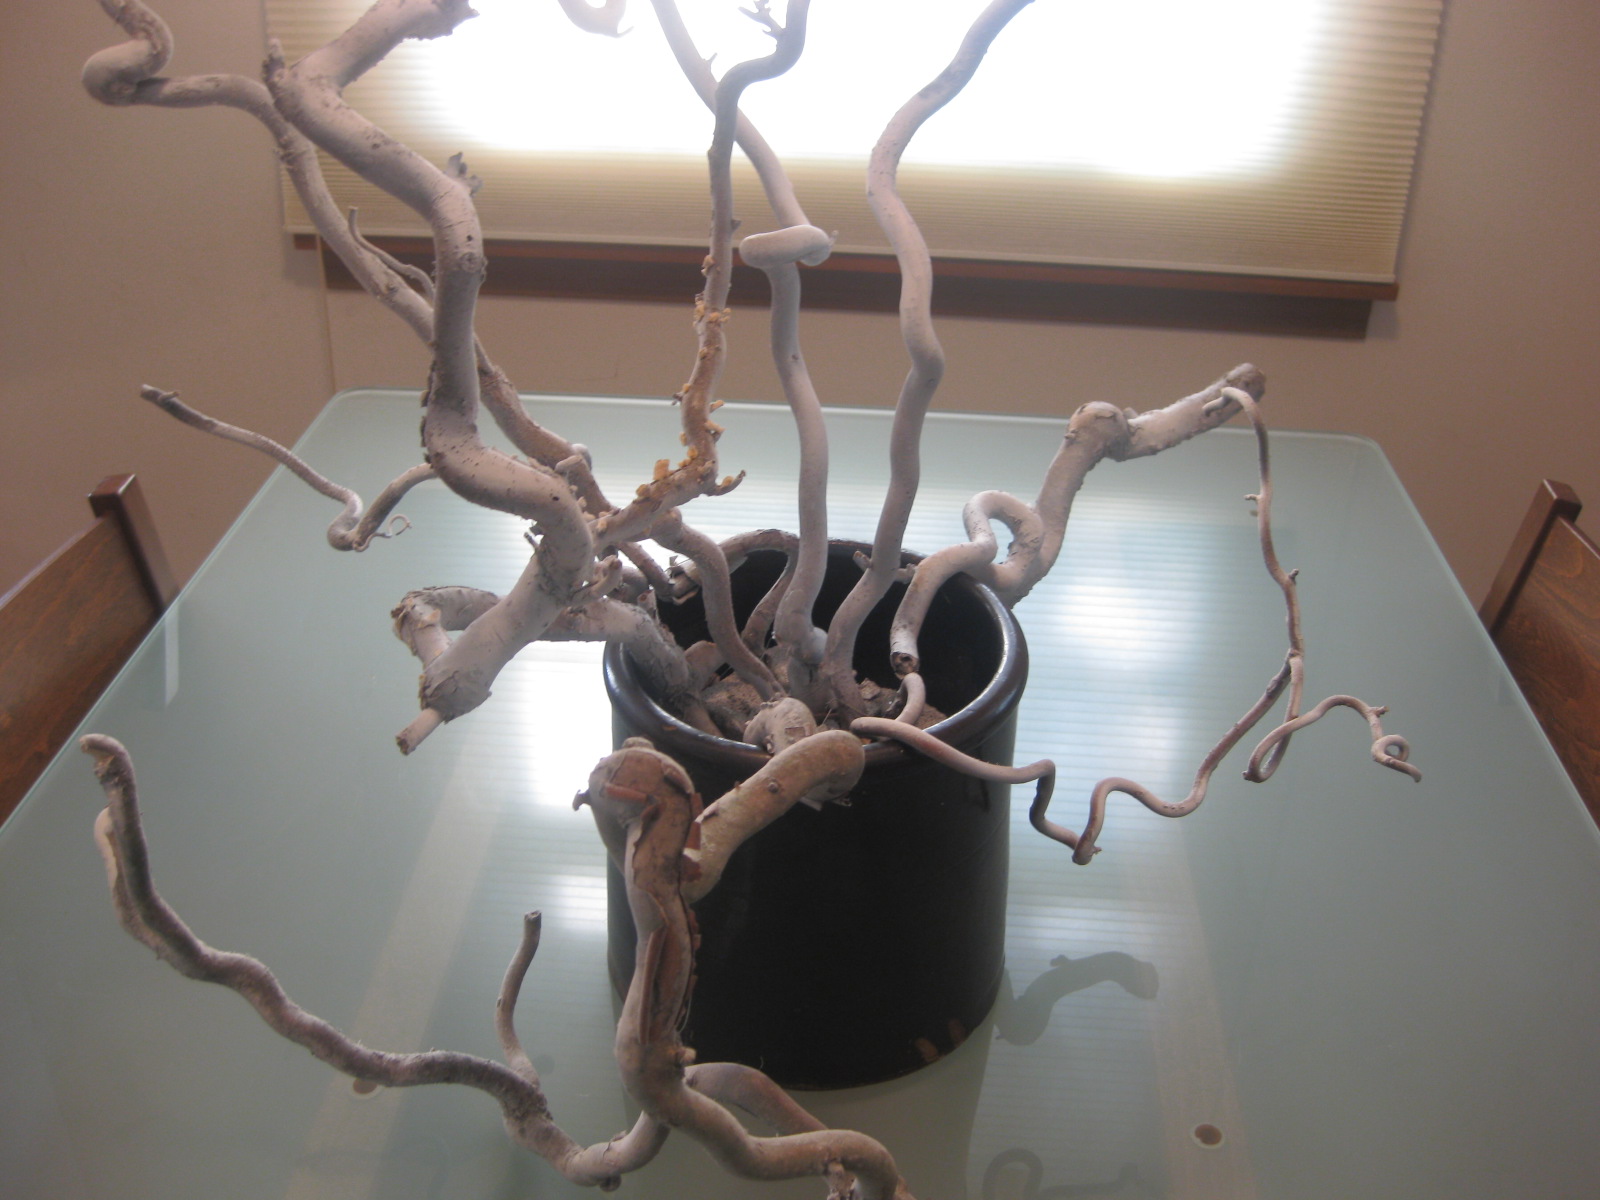
I've been seeing a lot of white twigs - in magazines, catalogs, and graphic design. So mom made me a white twig centerpiece that is sculptural, minimalist and a little beachy! And it was so easy!!
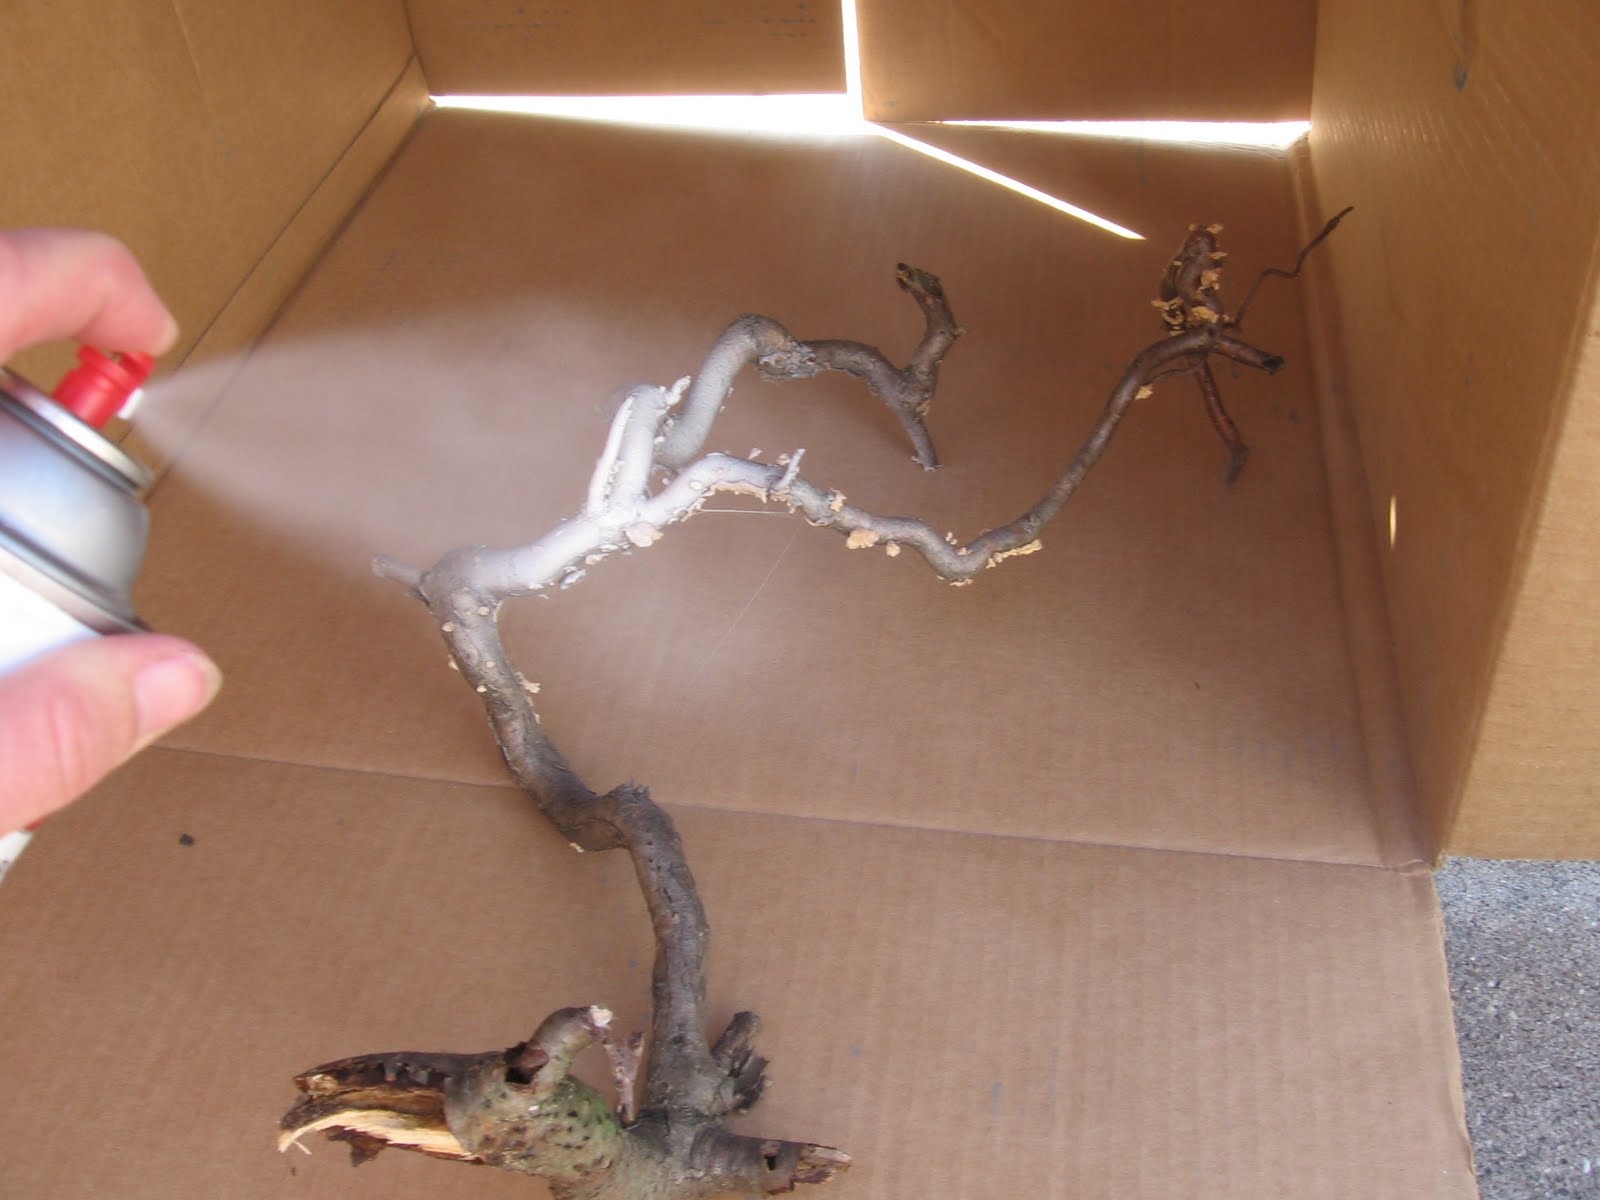
First she gathered some twigs. She chose very curvy twigs that were a little thicker. But you can pick any kind you like. Hers are also dead. This will stop the arrangement from changing due to the twigs drying out.
Spray your twigs with some white spray paint and let them dry.
Then you take a crock, put a floral block in the bottom and stick in your twigs. You may have to secure some of the twigs with hot glue. It depends on how big your twigs are and how strong your floral block is. It is that easy!! I also put some twigs around it so they look as though they are growing out of the crock.
I also think spraying the twigs black would be interesting. I'll see what mom's doing tomorrow...
First she gathered some twigs. She chose very curvy twigs that were a little thicker. But you can pick any kind you like. Hers are also dead. This will stop the arrangement from changing due to the twigs drying out.
Spray your twigs with some white spray paint and let them dry.
Then you take a crock, put a floral block in the bottom and stick in your twigs. You may have to secure some of the twigs with hot glue. It depends on how big your twigs are and how strong your floral block is. It is that easy!! I also put some twigs around it so they look as though they are growing out of the crock.
I also think spraying the twigs black would be interesting. I'll see what mom's doing tomorrow...
Monday, September 6, 2010
Decorative Wine Bottles
Ever wonder what to do with your empty wine bottles other than cashing them in for your deposit? Wine bottles have some of the best artwork out there on their labels! And the glass color is amazing. So why not display them?? But let's make them look even better!
All you need is a wine bottle, some beads, corks, copper wire, fake grapes and some ribbon.
First take your copper wire and stick the end into a cork. Be sure not to straighten out the wire. Leave that nice spiral. It will look better when we attach it to the bottle.
Next wrap the wire once around the neck of the bottle, right in the middle of the wire. Then pick out some beads and either attach them to the wire or just wrap them around the neck of the bottle.
Next are our grapes. Use the wire as a place to attach them on the opposite side of the beads.
Last, tie a coordinating ribbon into a nice bow around the neck. Use the bow to hide an plastic the beads or grapes may be attached to. Tuck that plastic under the bow. You can even add a candle in the bottle.
Now you have a nice centerpiece or decorative accent. Decorate an unopened bottle to take as a hostess gift. Or place a couple under your Christmas tree to have on hand for guests that may drop by you don't have a gift for. They are great for "emergency" gifts!!
All you need is a wine bottle, some beads, corks, copper wire, fake grapes and some ribbon.
First take your copper wire and stick the end into a cork. Be sure not to straighten out the wire. Leave that nice spiral. It will look better when we attach it to the bottle.
Next wrap the wire once around the neck of the bottle, right in the middle of the wire. Then pick out some beads and either attach them to the wire or just wrap them around the neck of the bottle.
Next are our grapes. Use the wire as a place to attach them on the opposite side of the beads.
Last, tie a coordinating ribbon into a nice bow around the neck. Use the bow to hide an plastic the beads or grapes may be attached to. Tuck that plastic under the bow. You can even add a candle in the bottle.
Now you have a nice centerpiece or decorative accent. Decorate an unopened bottle to take as a hostess gift. Or place a couple under your Christmas tree to have on hand for guests that may drop by you don't have a gift for. They are great for "emergency" gifts!!
For more great projects, visit Susan at Between Naps on the Porch.
Subscribe to:
Posts (Atom)