Welcome to Happy Hour at Henrietta's House!!
Women and Wine parties consist of inviting all of your girlfriends over for some wine, food and fun! Everyone brings their own bottle of wine and a glass and the hostess provides some food.
This weekend we had another fun Women and Wine party - this time in the Sunshine State!!
Mom outdid herself again and made some wonderful dips - avocado dip, shrimp dip and more.
She made her famous raspberry cheesecake tartlets and some Hershey's kiss with almond cookies.
Check out these endive stalks with dip!! Yum!
One of the ladies brought escargot in these beautiful shells. I wasn't brave enough to try them but my sister was. She said they were wonderful. They tasted like mushrooms with garlic! Maybe I'll get brave some day!
Check out our first Women and Wine party!
Cheers!
Showing posts with label Fun. Show all posts
Tuesday, February 8, 2011
Saturday, January 29, 2011
Pheasants and Ferragamo
I was searching around the web for anything pheasant related and a picture of Carrie from Sex and the City (the first movie, the good movie) came up. What did I see but Carrie holding a pheasant feather handbag!
The bag is by Ferragamo. I have the cutest bag that mom gave me for my birthday a few years ago that is VERY similar to the Ferragamo bag. I only use it on special occasions. It is small and satin and has the feather detail with a silver clasp. Who knew I was so in fashion!
Sunday, October 24, 2010
Making Curtains a Little Creepy
We're getting ready for our annual Halloween party. With the exception of a couple years, we have been holding a Halloween party since we moved into this house 9 years ago. Our neighborhood gets CRAZY during trick-or-treat time so family and friends hang out at our house and it is a great time! Can't wait.
So we have been decorating the house for the big night. Today my daughter and I make some easy curtain embellishments in the forms of some creepy creatures. Hobby Lobby had these great Halloween shapes you can decorate.
We decided to decoupage them with some Mod Podge and some wrinkled tissue paper.
The key is wadding up your tissue paper really good and then carefully un-wadding.
Then you cover one side with Mod Podge and press down on the tissue paper. We let that side dry and then did the other side. I used an Exacto knife to trim the excess tissue paper.
They came with the black tie so I tied one on each curtain rod - two in the dining area and one in the living room.
I think they turned out great! And it was such and easy and fun Sunday afternoon project!
Don't forget our Happy Hour Link Party happening this Wednesday!! Hope to see you there!
So we have been decorating the house for the big night. Today my daughter and I make some easy curtain embellishments in the forms of some creepy creatures. Hobby Lobby had these great Halloween shapes you can decorate.
We decided to decoupage them with some Mod Podge and some wrinkled tissue paper.
The key is wadding up your tissue paper really good and then carefully un-wadding.
Then you cover one side with Mod Podge and press down on the tissue paper. We let that side dry and then did the other side. I used an Exacto knife to trim the excess tissue paper.
They came with the black tie so I tied one on each curtain rod - two in the dining area and one in the living room.
I think they turned out great! And it was such and easy and fun Sunday afternoon project!
Don't forget our Happy Hour Link Party happening this Wednesday!! Hope to see you there!
Sunday, October 3, 2010
Spooky Tree for Halloween
Remember my white twig centerpiece I did a couple weeks ago? I used it for the chocolate and turquoise tablescape that was one of my favorites! And now I have repurposed it for a Halloween decoration. This was a fun project my daughter and I did this afternoon.
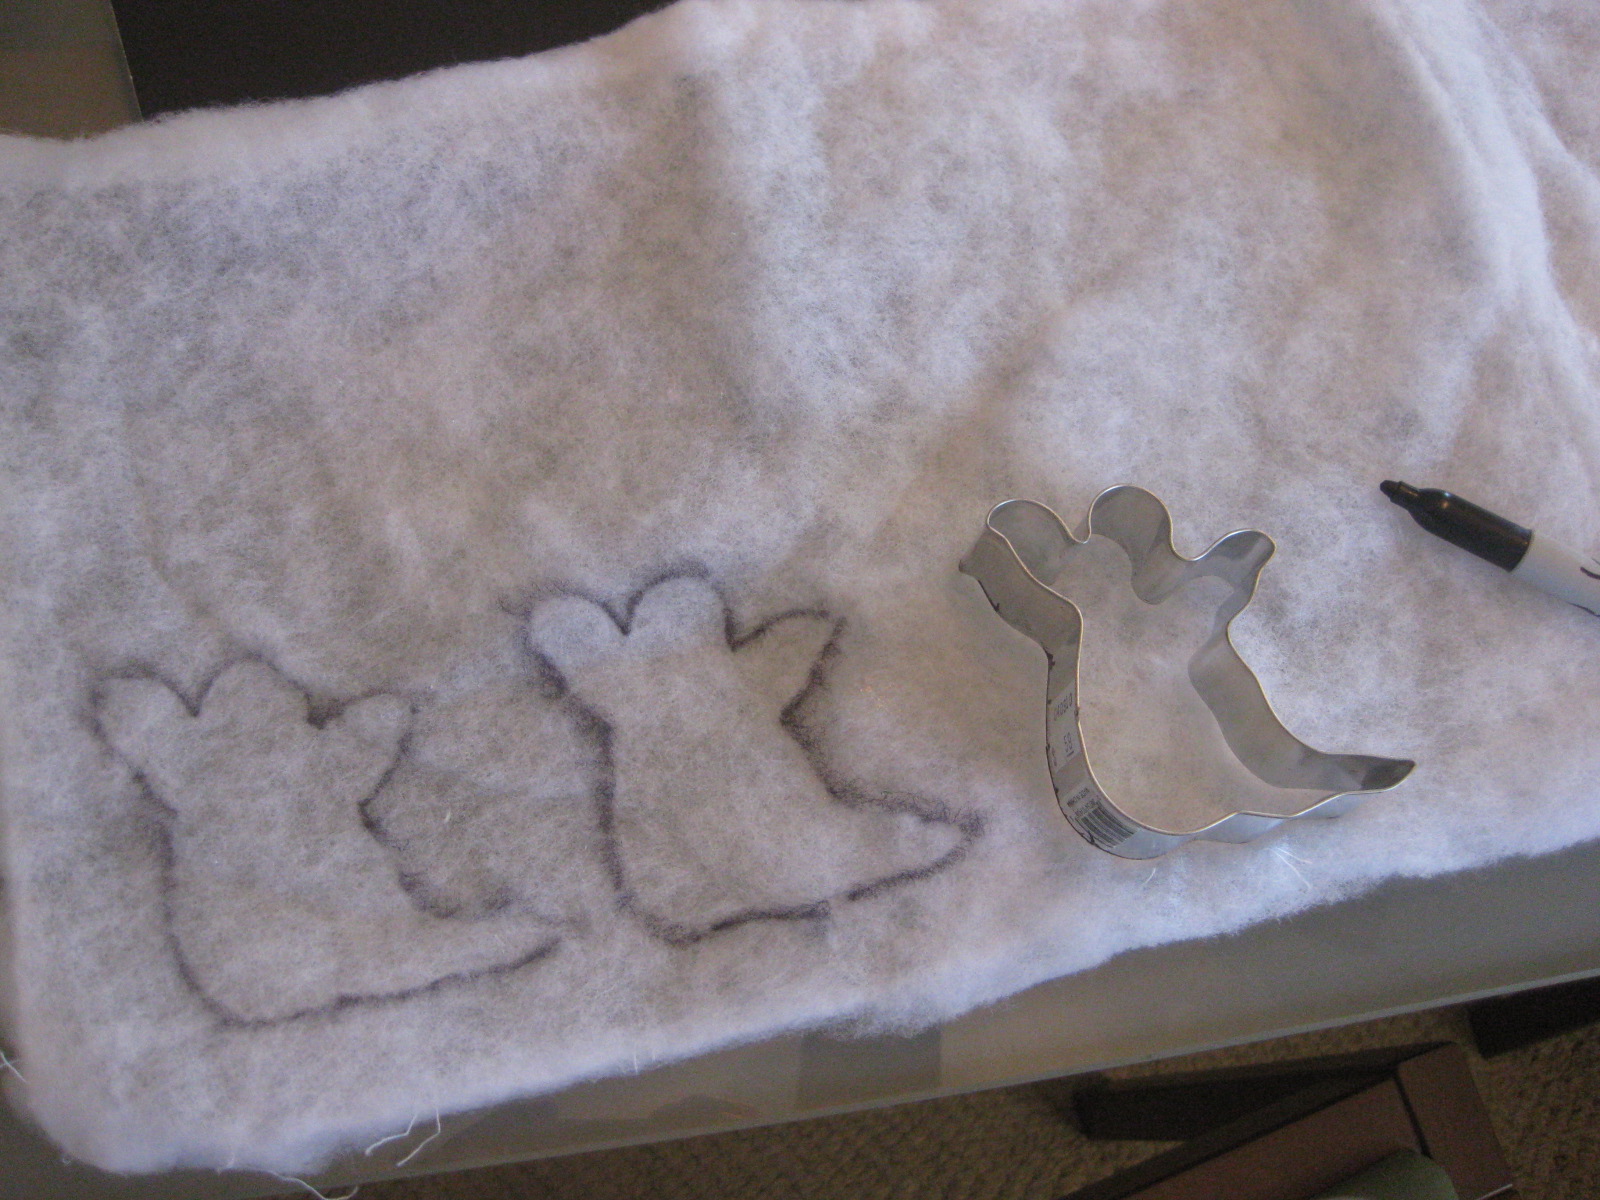
We used black poster board, an old envelope, some leftover batting and fabric, and cookie cutters for templates.
The batting was perfect for the ghosts. It's see-through and wispy, just like ghosts! I only needed one moon so the old envelope worked perfect. And of course bats need to be black so we bought some poster board. We traced around the cookie cutters and cut out the shapes. I used a thread and needle to hang the shapes on the tree.
I had some leftover fabric that I wrapped around the base of the centerpiece and tucked it in the top.
While buying the poster board we found a scary "crystal" skull candle holder. I had three goblets that I didn't know what to do with, but they go perfectly with the skull as candle holders!!
Now we have even more Halloween decorations to enjoy! Do you need some great Halloween ideas? Go to Between Naps on the Porch and check out Metamorphosis Monday!!
We used black poster board, an old envelope, some leftover batting and fabric, and cookie cutters for templates.
The batting was perfect for the ghosts. It's see-through and wispy, just like ghosts! I only needed one moon so the old envelope worked perfect. And of course bats need to be black so we bought some poster board. We traced around the cookie cutters and cut out the shapes. I used a thread and needle to hang the shapes on the tree.
I had some leftover fabric that I wrapped around the base of the centerpiece and tucked it in the top.
While buying the poster board we found a scary "crystal" skull candle holder. I had three goblets that I didn't know what to do with, but they go perfectly with the skull as candle holders!!
Now we have even more Halloween decorations to enjoy! Do you need some great Halloween ideas? Go to Between Naps on the Porch and check out Metamorphosis Monday!!
Sunday, September 19, 2010
Designer Doghouses
It was raining here yesterday and my precious pooch did everything she could to keep from going outside - hiding under our bed, running from us, then eventually, after we got her outside, looking so sad and pathetic standing out there, that we had to bring her right in. That got me thinking that if she had to stay outside, she would need some digs worthy of her diva lifestyle.
Here are some pics from All About Dog Houses. I know my Daisy would feel right at home in one of these!
Monday, August 23, 2010
Reception by the Lake
What will be known from now on as the Epic Road Trip, a whirlwind 11-hour trip to the heart of South Dakota, has ended. We celebrated my Grandma's wedding with a lakeside reception at Cottonwood Lake. The kids swam, caught frogs and made new friends while we caught up with family and old friends, laughed and danced under the stars.
And no road trip would be complete without stopping at a famous tourist attraction! The Mitchell, SD, Corn Palace is decorated with corn and redecorated every year.
And what did we find inside? An amazing collection of corn dishes!! I could have used some of these pieces for my Summer's Bounty tablescape!
I feel refreshed and inspired after this trip to Great-Grandma Henrietta's hometown. I hadn't been back there in many years and it's always good to get back to your roots!
And no road trip would be complete without stopping at a famous tourist attraction! The Mitchell, SD, Corn Palace is decorated with corn and redecorated every year.
And what did we find inside? An amazing collection of corn dishes!! I could have used some of these pieces for my Summer's Bounty tablescape!
I feel refreshed and inspired after this trip to Great-Grandma Henrietta's hometown. I hadn't been back there in many years and it's always good to get back to your roots!
Sunday, August 15, 2010
Handmade Birthday Gift Box
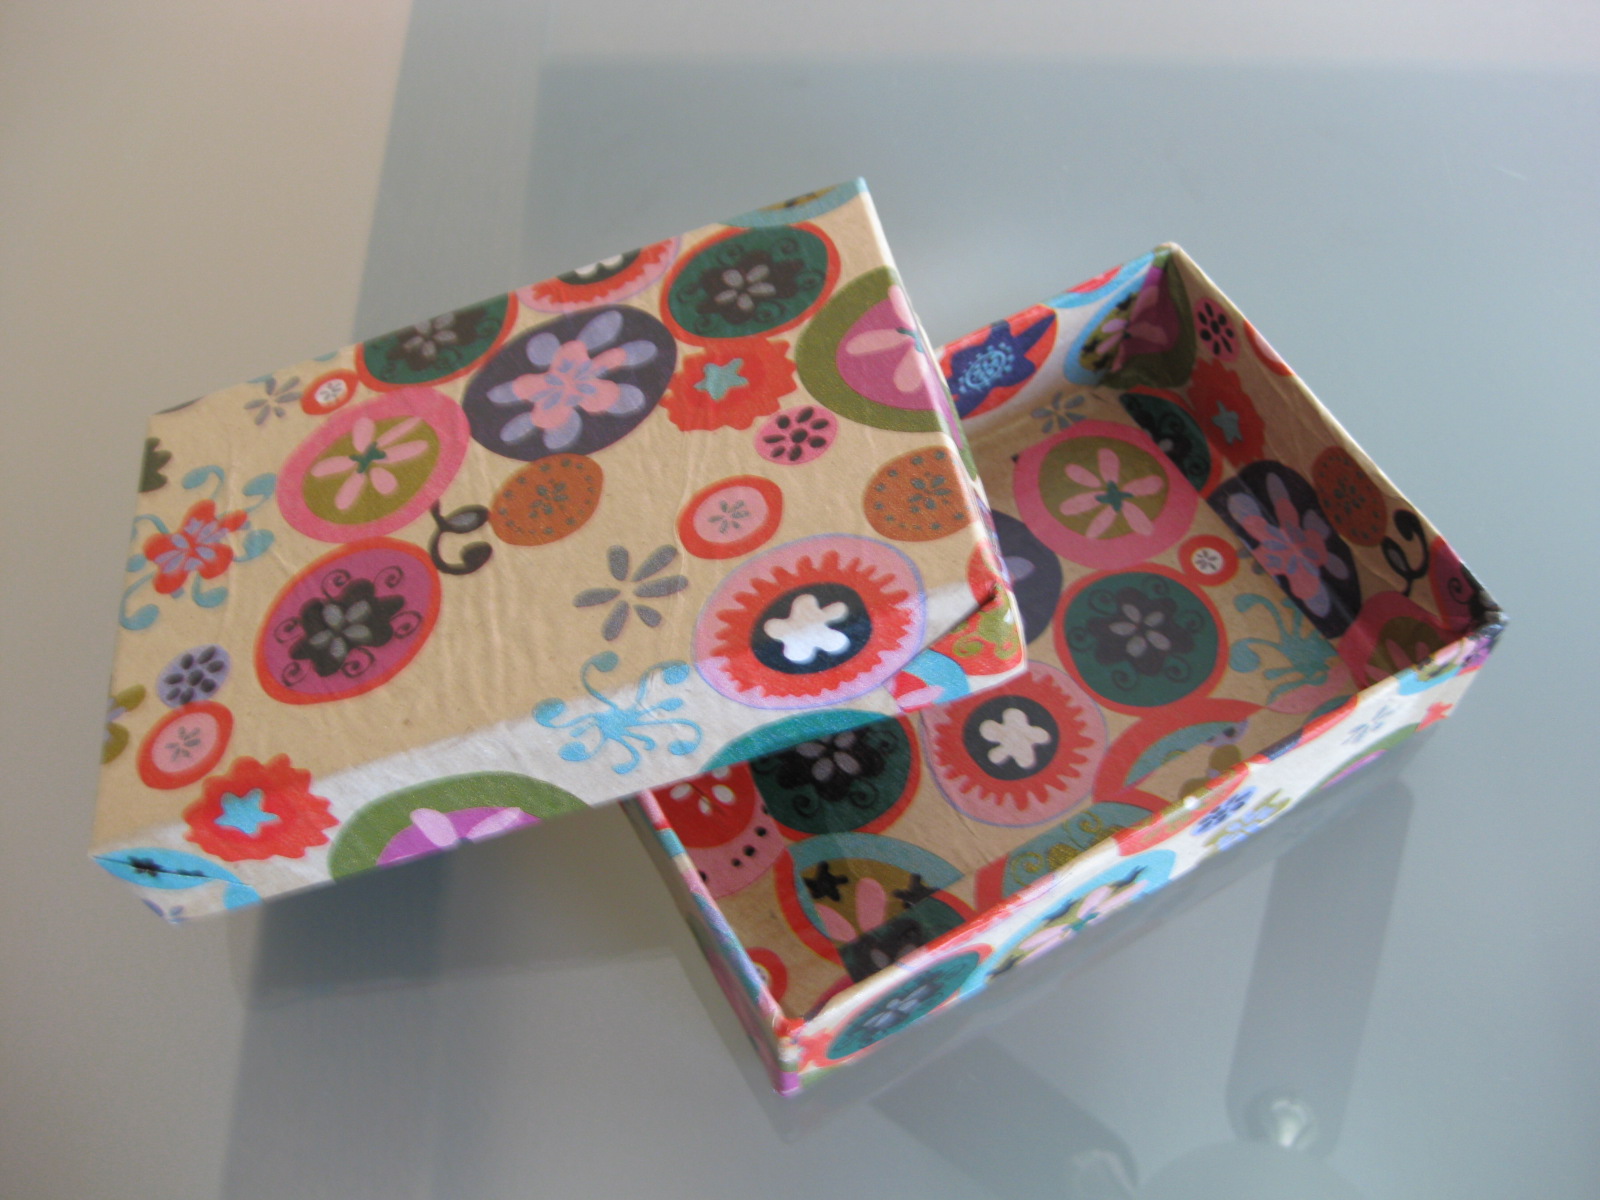
Today we are celebrating my sister's birthday. I am still in my decoupage mode from my last success with the playroom art project so I made her a box for her gift.
The paper I used is actually saved paper from a gift she gave me, so I know she'll like it! It is a heavy brown craft paper. I cut the paper to the exact measurement of the inside of the lid and used the Mod Podge first, then put the paper in.
Then I cut a square big enough to wrap the whole lid. I covered the underside in Mod Podge then I cut the excess paper away so when I folded up the sides there wasn't a lot of extra paper. Remember, the lid has to fit over the box. I used a thin layer of Mod Podge as I went, one side at a time.
Then I did the same thing with the box.
I let it dry, with the lid off the box, overnight. The Mod Podge I used is high gloss. I recommend using the matte finish if you do not cover the outside with Mod Podge. You can see a little of the gloss in the corners on the inside of the box with the high gloss.
Now she has a box she can use for trinkets, jewelry, a gift for someone else, anything!!
The paper I used is actually saved paper from a gift she gave me, so I know she'll like it! It is a heavy brown craft paper. I cut the paper to the exact measurement of the inside of the lid and used the Mod Podge first, then put the paper in.
Then I cut a square big enough to wrap the whole lid. I covered the underside in Mod Podge then I cut the excess paper away so when I folded up the sides there wasn't a lot of extra paper. Remember, the lid has to fit over the box. I used a thin layer of Mod Podge as I went, one side at a time.
Then I did the same thing with the box.
I let it dry, with the lid off the box, overnight. The Mod Podge I used is high gloss. I recommend using the matte finish if you do not cover the outside with Mod Podge. You can see a little of the gloss in the corners on the inside of the box with the high gloss.
Now she has a box she can use for trinkets, jewelry, a gift for someone else, anything!!
Sunday, August 8, 2010
Easy Art Project
I had been trying to figure out what to do with a canvas I had partially painted. I knew I wanted to hang it in the playroom but didn't know how to finish it. Then it hit me - decoupage!! I had never done it so this was quite an experiment. It would either work, or I would ruin the canvas.
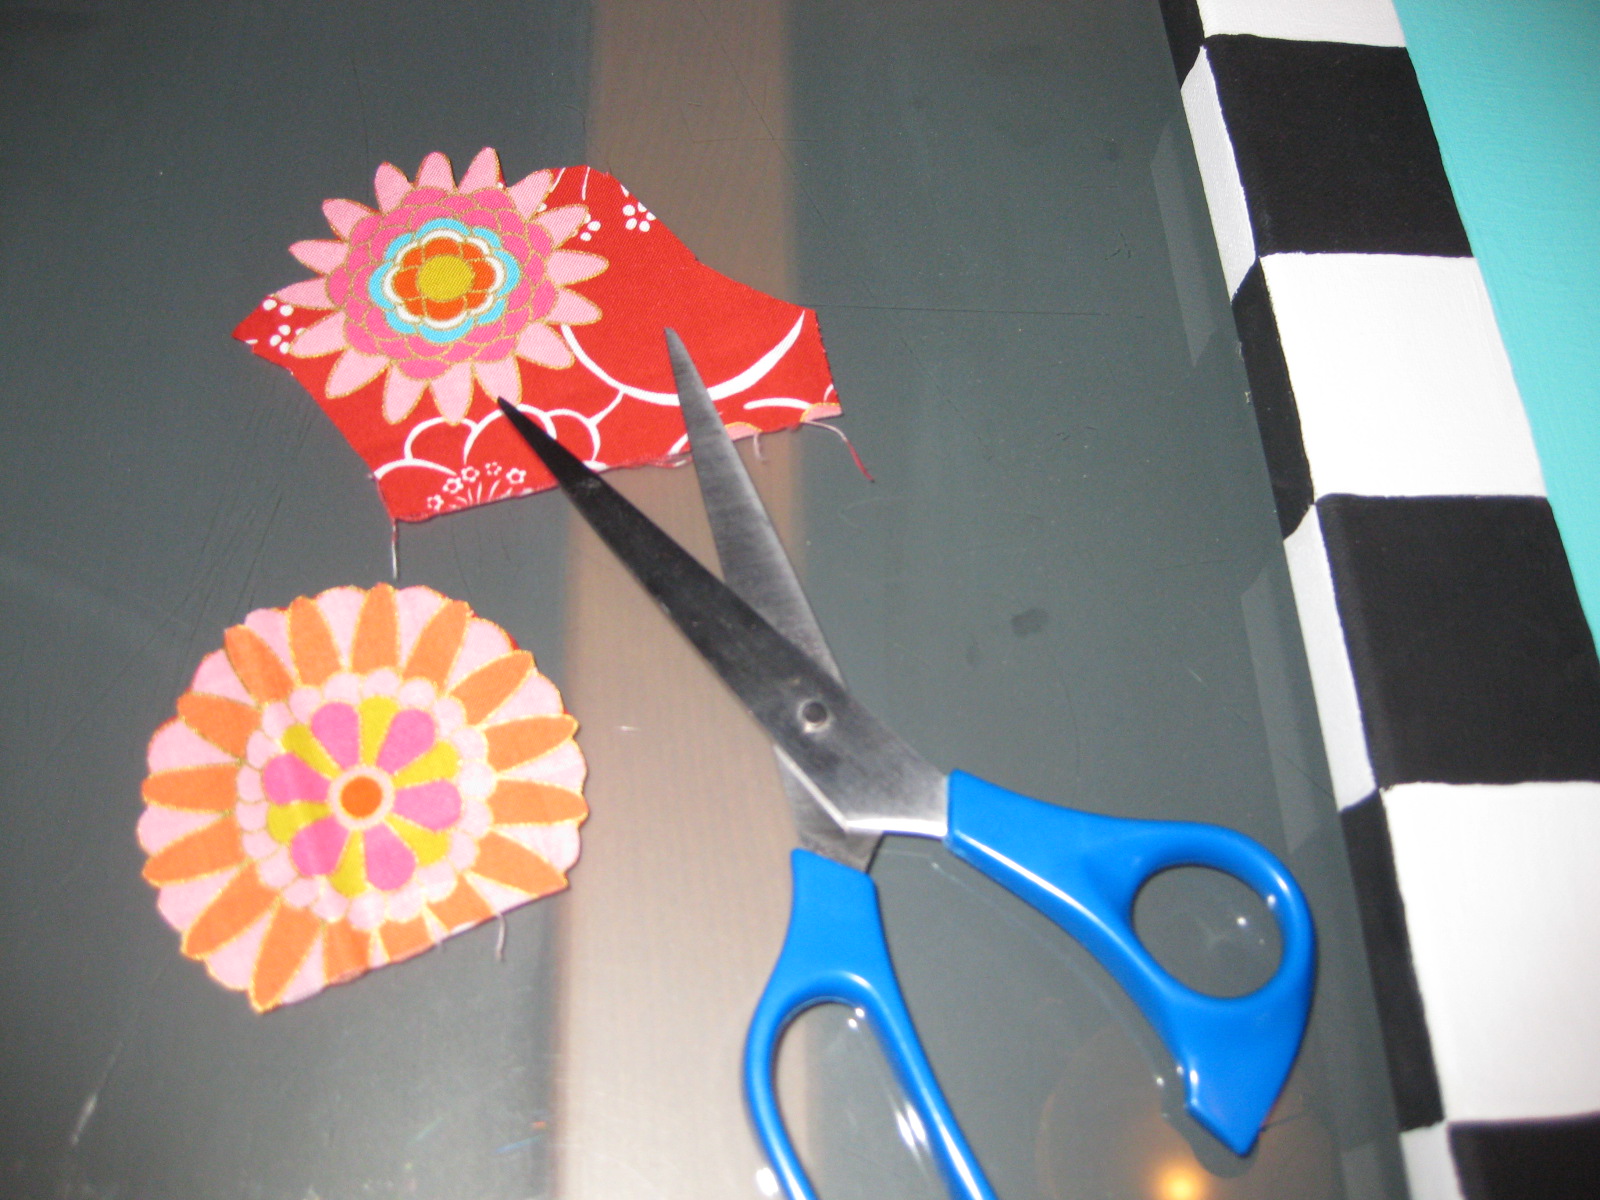
I had some leftover fabric from the playroom curtains. I love the curtain fabric. It's so bright and fun with its retro-looking zinnia-like flowers. So I decided to repeat that flower theme in the artwork.

I cut out a variety of flowers from the fabric and placed them on the canvas.

Then I used Mod Podge to paste on the flowers and then covered the entire canvas with a thin layer. I used high gloss so my mediocre job I did cutting the flowers would be less noticeable than if I had used the matte finish. The Mod Podge goes on white and dries clear, which is nice to be able to see when it is dry. Although it's a little stinky - so beware!
Now we have fun and colorful playroom artwork that was so easy!!
For more great projects, visit Susan at Between Naps on the Porch.
I had some leftover fabric from the playroom curtains. I love the curtain fabric. It's so bright and fun with its retro-looking zinnia-like flowers. So I decided to repeat that flower theme in the artwork.
I cut out a variety of flowers from the fabric and placed them on the canvas.
Then I used Mod Podge to paste on the flowers and then covered the entire canvas with a thin layer. I used high gloss so my mediocre job I did cutting the flowers would be less noticeable than if I had used the matte finish. The Mod Podge goes on white and dries clear, which is nice to be able to see when it is dry. Although it's a little stinky - so beware!
Now we have fun and colorful playroom artwork that was so easy!!
For more great projects, visit Susan at Between Naps on the Porch.
Subscribe to:
Posts (Atom)